DIY BBQ Pit: How to Build Your Own Smoker

Table of Contents
1. Introduction
- Why Build Your Own Smoker?
2. Planning Your DIY Smoker
- Decide on the Type of Smoker
- Gather Your Materials
3. Step-by-Step Guide: How to Build a Basic Ugly Drum Smoker (UDS)
- Preparing the Drum
- Adding the Grates and Rods
- Adding the Lid and Chimney
- Painting and Final Touches
4. How to Build a Brick BBQ Pit Smoker
- Choose the Location
- Build the Foundation
- Add the Grates
- Create a Lid
5. Tips for Using Your DIY Smoker
6. Maintenance and Safety
- Clean After Every Use
- Inspect for Wear
- Practice Fire Safety
7.
Conclusion
Barbecue enthusiasts know that there’s nothing quite like the taste of slow-smoked meat. Building your own DIY BBQ pit or smoker can elevate your backyard cooking game and provide a unique cooking experience. This article will guide you through the essential steps to build your own smoker, from choosing the right materials to assembly and finishing touches.
Why Build Your Own Smoker?
Building your own smoker allows you to customize the size and shape, choose the materials, and add features that suit your needs. It’s not just about cooking—it’s about creating something with your hands, a rewarding process that results in better-tasting food. Plus, a DIY smoker can save money compared to purchasing a high-end commercial model.
Planning Your DIY Smoker
1. Decide on the Type of Smoker
There are various smoker types, but for a DIY project, these are the most popular:
- Offset Smoker: Features a firebox connected to the main cooking chamber, with smoke flowing through for indirect cooking.
- Vertical Smoker: Has a vertical design with the heat source at the bottom, and cooking grates stacked above.
- Ugly Drum Smoker (UDS): Made from a 55-gallon steel drum, simple yet highly effective.
Choose the design that best fits your experience level, budget, and available space.
2. Gather Your Materials
The materials will depend on your smoker type, but common items include:
- Steel drum or metal sheets (for UDS or custom-built pits)
- Expanded metal grates (for cooking surfaces)
- Steel rods (to hold grates)
- Chimney or exhaust pipe
- Thermometer
- Fireproof cement (if using bricks or concrete blocks)
- Heat-resistant paint (for steel smokers)

Step-by-Step Guide: How to Build a Basic Ugly Drum Smoker (UDS)
1. Preparing the Drum
A 55-gallon steel drum is commonly used for a UDS. Make sure the drum is food-grade and hasn't been used for toxic materials.
- Clean the Drum: Remove any residual oil or chemicals by scrubbing and burning out the drum. Place wood inside, ignite it, and let the drum burn out.
- Drill Vent Holes: Drill three or four holes around the bottom for air intake, and add a larger hole near the top for the exhaust chimney.
2. Adding the Grates and Rods
- Install Cooking Grates: Use steel rods to support the cooking grates. The first grate should be about 24 inches from the bottom, with an optional second grate above it.
- Charcoal Basket: Create a charcoal basket from expanded metal to hold the fuel. It should sit a few inches above the bottom for airflow.
3. Adding the Lid and Chimney
- Attach the Lid: A drum lid with a built-in vent works well, but if you don’t have one, a Weber kettle lid can be a great fit.
- Install the Chimney: Use an exhaust pipe or an adjustable vent on the lid to control smoke flow.
4. Painting and Final Touches
- Apply Heat-Resistant Paint: Protect the smoker from rust by applying a few coats of heat-resistant paint.
- Install a Thermometer: Place it near the top to monitor internal temperatures.

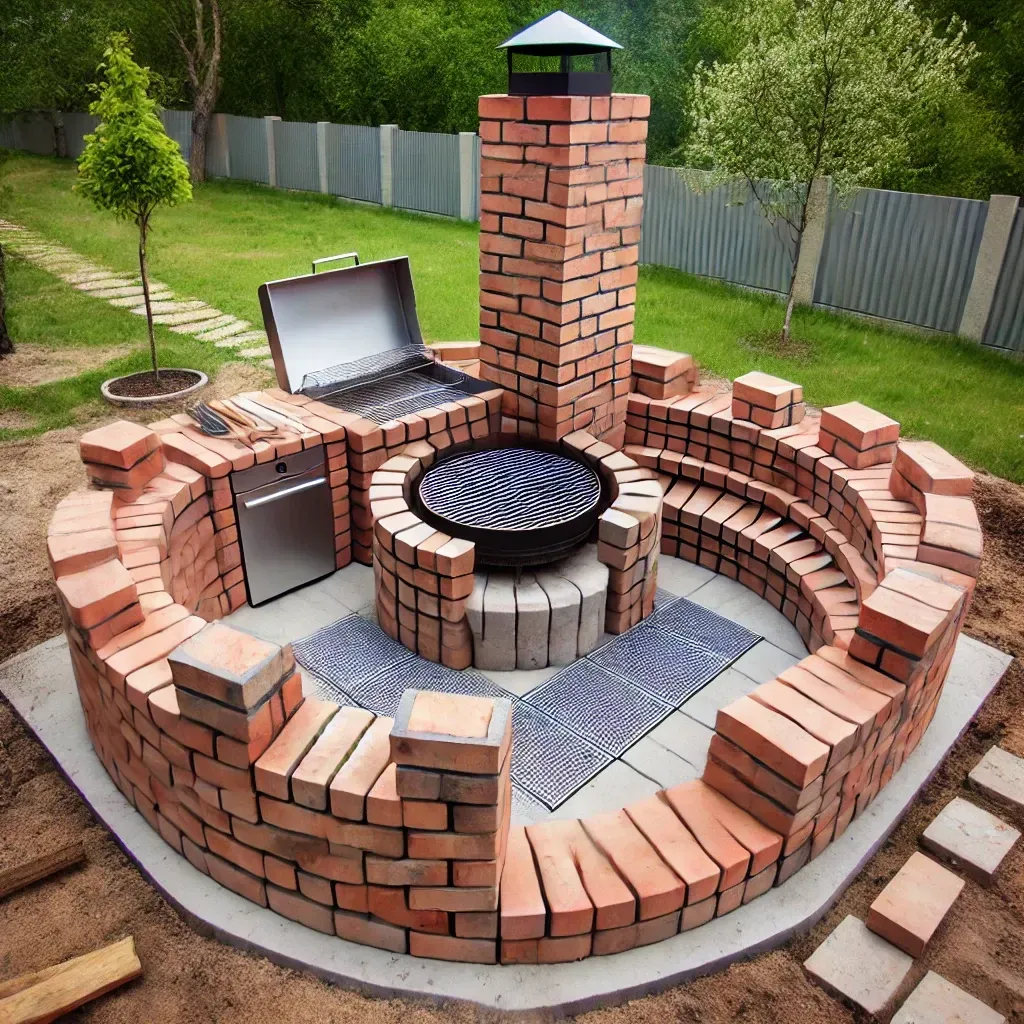
How to Build a Brick BBQ Pit Smoker
For a more permanent solution, consider building a brick smoker. Here’s how:
1. Choose the Location
Select a flat area in your backyard, away from overhanging trees and buildings.
2. Build the Foundation
- Lay a Concrete Slab: A slab of about 4-6 inches thick ensures stability.
- Arrange the Bricks: Start stacking bricks in a U-shape, with the back wall higher than the sides for better heat circulation.
3. Add the Grates
Insert metal grates between the brick layers at different heights for multiple cooking levels.
4. Create a Lid
A metal lid can help retain heat and smoke. Install it with a hinge for easy access.
Tips for Using Your DIY Smoker
- Season the Smoker: Before using your smoker for the first time, season it by coating the inside with oil and heating it to 250°F for several hours.
- Monitor Temperature: Use a high-quality thermometer to maintain consistent heat.
- Experiment with Wood Chips: Different types of wood impart different flavors. Try hickory, oak, or fruitwoods like apple for variety.
Maintenance and Safety
- Clean After Every Use: Remove ash and grease buildup to extend the smoker's life.
- Inspect for Wear: Check for any cracks, rust, or loose parts before each use.
- Practice Fire Safety: Always have a fire extinguisher nearby when smoking.
Building your own BBQ pit or smoker not only saves money but also adds a personal touch to your cooking setup. Whether you choose a drum smoker or a brick pit, the satisfaction of creating your own smoker and the delicious smoked meals that follow will be worth the effort.